Using WASPII
What Is WASPII?
Features
System Requirements
Download
Installation
Admin Notes
Sample Config
Sample Screen Shots
Using WASPII
Contact |
Assumption: The cgi
components of the WASPII system is installed into /home/httpd/cgi-bin/waspii and html
components are installed into /home/httpd/html/waspii. All the examples below are given
with these directories in mind.
To the WASPII user:
- Your WASPII administrator must have
created an entry point web page for WASPII services and must have informed you about this
page's address either by an e-mail or some other posting on your site's web pages. Point
your web broser to this address and choose the list(s) you want to subscribe to or
unsubscribe from. (Please note that some lists could be web subscribe/unsubscribe disabled
and you might not be able to subscribe/unsubscribe). A typical address to place the main
WASPII page is http://yourdomainname/waspii/lists.htm.
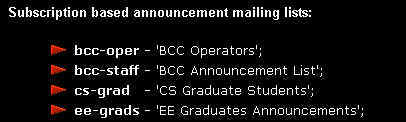
- Click the red arrow on the left of the
list you are interested to go to its subscription/unsubscription page.
- Enter your e-mail address in the box
and send a subscription or unsubscription request for yourself. (See example)
- Check your e-mail for a confirmation
message.
- Point your browser to the URL specified
in your confirmation message and click the "Subscribe" button to confirm your
subscription request.
- Now you are subscribed to an
announcement list and you will soon start receiving mail announcements posted to this list
by the list's administrator(s).
- Do not try to send mail announcements
to this list because you will not be able to do so unless you are a list administrator.
- You can contact the list administrator
using the the link provided at the top of the subscription/unsubscription page. Please
post all your suggestions to this email address.
To the master WASPII administrator:
- After you finish WASPII setup, go ahead
and create some lists. To create a new list, you must point your browser to
http://yourdomainname/waspii/creating2.htm.
Actually, the main web page (http://yourdomainname/waspii/lists.htm should be used
as the main web entry point to WASPII services and this page will have a "Create a
New List" button  if you have
declared your computer's IP as a secondary master administrator host IP or you are using
your web browser on the same host that you used to install WASPII. Please see item 13 in WASPII Installation. if you have
declared your computer's IP as a secondary master administrator host IP or you are using
your web browser on the same host that you used to install WASPII. Please see item 13 in WASPII Installation.
- Create an announcement list called
"General" or something like that and then click the Administration link at the
very bottom of your list creation report page to go to the Administration page.
- Subscribe a reasonable set of e-mail
addresses using the batch subscription feature.
- Create other announcement lists that
would serve (at least initially) the needs of your network community (Social Events List,
Management Announcements List, Project Group Announcements etc. etc.)
- Compose and send an announcement
message to your subscribers telling them about the new service and where they should point
their browsers (normally http://yourdomainname/waspii/lists.htm ).
- Edit the
/home/httpd/html/waspii/lists.htm file to your taste to make it appear conforming with
your site standards. The sample lists.htm file distrbuted by WASPII is an autoforward page
which automatically loads /home/http/cgi-bin/waspii/main.cgi; a PERL script which creates
the main WASPII page on the fly. It checks admin rights and parses the
/home/httpd/cgi-bin/waspii directory for announcement lists to display. You can edit the
/home/httpd/cgi-bin/waspii/main.cgi file to change how the main WASPII page looks but this
requires some PERL experience.
|